
On this page
Setting up a travel eSIM used to be confusing. Different apps, unclear activation steps, and instructions that assumed you already knew what an LPA string was. In 2026, services like Roamix have changed that completely. The setup is genuinely simple: buy a plan, scan a QR code, travel.
This guide breaks down exactly what makes the experience hassle-free — and what to watch out for so yours goes smoothly.
The Old Way Was Genuinely Painful
Before eSIMs, staying connected abroad meant one of three things: paying your carrier's international roaming rates (expensive), buying a local SIM at the airport (slow, inconvenient, requires unlocking your phone), or hunting down a SIM card shop after you landed (wastes travel time).
Even early eSIM services had their own friction: confusing activation portals, apps that required account registration before you could view a single price, and QR codes that expired if you accidentally scanned them too early.
What made it hard
- Physical SIM required a trip to a store or airport kiosk
- Carrier roaming required calling or enabling a setting that was buried in your account
- Local SIMs required arriving, finding a vendor, negotiating in a foreign language, and waiting
- Early eSIM apps required downloads, account creation, and navigation through unfamiliar UIs
Travelers wasted real time and money on the process of just getting connected.
What Modern eSIM Setup Looks Like
The defining shift in 2026 is that the entire process — discovery, purchase, installation — happens in a web browser before you ever board a plane.
With Roamix, the flow is:
- Visit roamix.app from any device
- Search your destination and pick a plan (data size + validity period)
- Pay via card, Apple Pay, or Google Pay
- Receive a QR code in your email within 60 seconds
- Scan the QR code in your phone's Settings over Wi-Fi
- When you land, your phone connects to the local network automatically
The full process from "I need a SIM for my trip" to "eSIM is installed and ready" takes under 5 minutes.
No app download. No store visit. No physical card. No activation call.
Step-by-Step: How the Roamix Installation Works
The installation steps differ slightly by phone model, but the general path is the same on both iPhone and Android.
iPhone installation
- Open Settings
- Tap Cellular (or Mobile Data depending on your region)
- Tap Add eSIM or Add Cellular Plan
- Tap Use QR Code and scan the Roamix QR code
- Tap Continue, name the plan (e.g., "Roamix Travel"), then tap Done
- When asked which line to use for cellular data, select Roamix
- Go to Settings > Cellular > Roamix and enable Data Roaming
Android installation (Samsung)
- Open Settings
- Tap Connections > SIM Manager
- Tap Add SIM > Scan QR code
- Scan the Roamix QR code and confirm
- Set Roamix as the Mobile Data SIM in SIM Manager
- Enable Data Roaming for the Roamix line
Android installation (Google Pixel)
- Open Settings
- Tap Network & Internet > SIMs > Add SIM
- Scan the QR code and follow the prompts
- Set Roamix as the preferred data SIM
Full step-by-step guides with screenshots are available in the Roamix Help Center.
What You Need Before You Start
Three things, and that's genuinely it:
1. An eSIM-compatible phone that is carrier-unlocked
Your phone must support eSIM. Most iPhones from the XS (2018) onward and most flagship Android phones from 2020 onward do. The device also needs to be carrier-unlocked — phones tied to a specific carrier typically cannot use third-party eSIMs until unlocked.
Use the Roamix Compatibility Checker if you're not sure. It's free and tells you instantly.
2. A Wi-Fi connection
You need internet access to download the eSIM profile when you scan the QR code. Home Wi-Fi, hotel Wi-Fi, or a café connection all work. You don't need to be at your destination — you can and should install the eSIM before you depart.
3. The QR code from your confirmation email
Roamix sends the QR code to your email within 60 seconds of payment. It's also stored in your Roamix account under My eSIMs, so you can access it any time.
When Does the Data Validity Start?
One of the most important things to understand: your plan's validity countdown does not begin when you install the eSIM. It begins when your device first connects to a local network at your destination.
This means you can install the eSIM weeks before your trip without wasting any of your data allowance. The plan only starts running when you actually arrive and connect.
Common Setup Mistakes (and How to Avoid Them)
Even with a simple process, a few things trip travelers up:
Scanning the QR code twice. Each QR code can only be scanned once. If your first scan fails, go to your Roamix account dashboard and re-download the QR code — or use the manual LPA string included in your confirmation email.
Not enabling Data Roaming. After installing the eSIM, you need to make sure Data Roaming is turned on for the Roamix line specifically. This setting is often off by default as a safety measure for home carrier roaming costs. Go to Settings > Cellular > [Roamix line] > Data Roaming and toggle it on.
Not setting Roamix as the active data line. If you have a physical SIM and the eSIM installed simultaneously (Dual-SIM), you need to tell your phone to use Roamix for cellular data, not your home SIM. Do this in Settings > Cellular > Cellular Data before you travel.
Installing the eSIM without Wi-Fi. You need a Wi-Fi connection to download the eSIM profile. Don't wait until you're at the airport with no Wi-Fi — install it at home the day before.
Traveling to Multiple Destinations
One Roamix eSIM profile stays installed on your phone even when you're not using it. If your trip covers multiple countries, you have options:
- Individual country plans: Buy separate plans for each country you visit. Each installs as a separate eSIM or, with some plans, uses the same eSIM profile with a separate data package.
- Regional plans: Roamix offers multi-country regional plans for Europe (30+ countries), Asia (20+ countries), the Americas, and the Middle East. One installation works across all countries in the region.
For most multi-country travelers, a regional plan is the simpler option. See Multi-Country eSIM Guide for a full breakdown.
What Happens When You Run Out of Data?
If you use up your data before your plan expires, you can add a top-up directly from your Roamix account dashboard — no reinstalling the eSIM required. The additional data is added to your existing plan and available within minutes.
This is one of the biggest advantages over local SIM cards, which often require visiting a store or finding a vendor to buy more credit.
Is It Really That Simple?
For most travelers, yes. The combination of instant QR delivery, web-based purchase, and automatic network connection on arrival makes modern travel eSIM setup genuinely frictionless.
The Roamix How It Works page covers the full process with visuals. For device-specific guides, visit the Compatible Devices section. And if anything goes wrong, 24/7 support is available via email with typical response times under 4 hours.
The key insight is simple: with a travel eSIM, the setup is done before your trip begins. By the time you land, you're already connected.
Frequently Asked Questions
What makes setting up an eSIM for travel hassle-free these days?
Three things have changed the experience entirely: instant digital delivery, no hardware involved, and setup that happens before you board. With Roamix, you buy a plan online, receive a QR code in your email within 60 seconds, scan it in your phone's Settings over Wi-Fi at home, and connect automatically when you land. There's no store to visit, no SIM to insert, and no activation call to make. The whole process takes under 5 minutes.
Do I need to visit a store or airport kiosk to get a travel eSIM?
No. The entire Roamix purchase and setup process happens online from any web browser. You don't need to download an app either. Buy a plan, receive the QR code by email, scan it in Settings before you travel — that's the whole process.
How long does it take to activate a Roamix eSIM?
From purchase to installed eSIM is typically under 5 minutes. The QR code arrives by email within 60 seconds of payment. Scanning and installing the eSIM profile in your phone's Settings takes 2–3 minutes. Your phone connects to the local network automatically when you arrive at your destination — no further steps required.
Can I install the eSIM before I travel, or do I need to wait until I arrive?
You should install the eSIM profile before you travel. You need a Wi-Fi connection to download the profile, and installing it at home means you're ready the moment you land. The data validity countdown doesn't start until your device connects to a local network at your destination, so installing early doesn't waste any of your plan.
What do I need to set up a travel eSIM?
Three things: an eSIM-compatible phone that is carrier-unlocked, a Wi-Fi connection to download the eSIM profile, and the QR code from your Roamix confirmation email. That's it. Use the free Compatibility Checker at roamix.app/tools/compatibility to confirm your device is supported.
What if I have trouble scanning the QR code?
QR codes can only be scanned once, so if the scan fails, download a fresh copy from your Roamix dashboard under My eSIMs. You can also enter the activation details manually — your confirmation email includes an LPA string (SM-DP+ address and activation code) that can be typed in manually in your phone's eSIM settings.
Does Roamix require an app to set up or manage an eSIM?
No app is needed. Roamix works entirely through a web browser — purchase, QR code delivery, and plan management all happen at roamix.app. This makes it simpler than competitors that require a mobile app download before you can even browse plans.
More in How-to
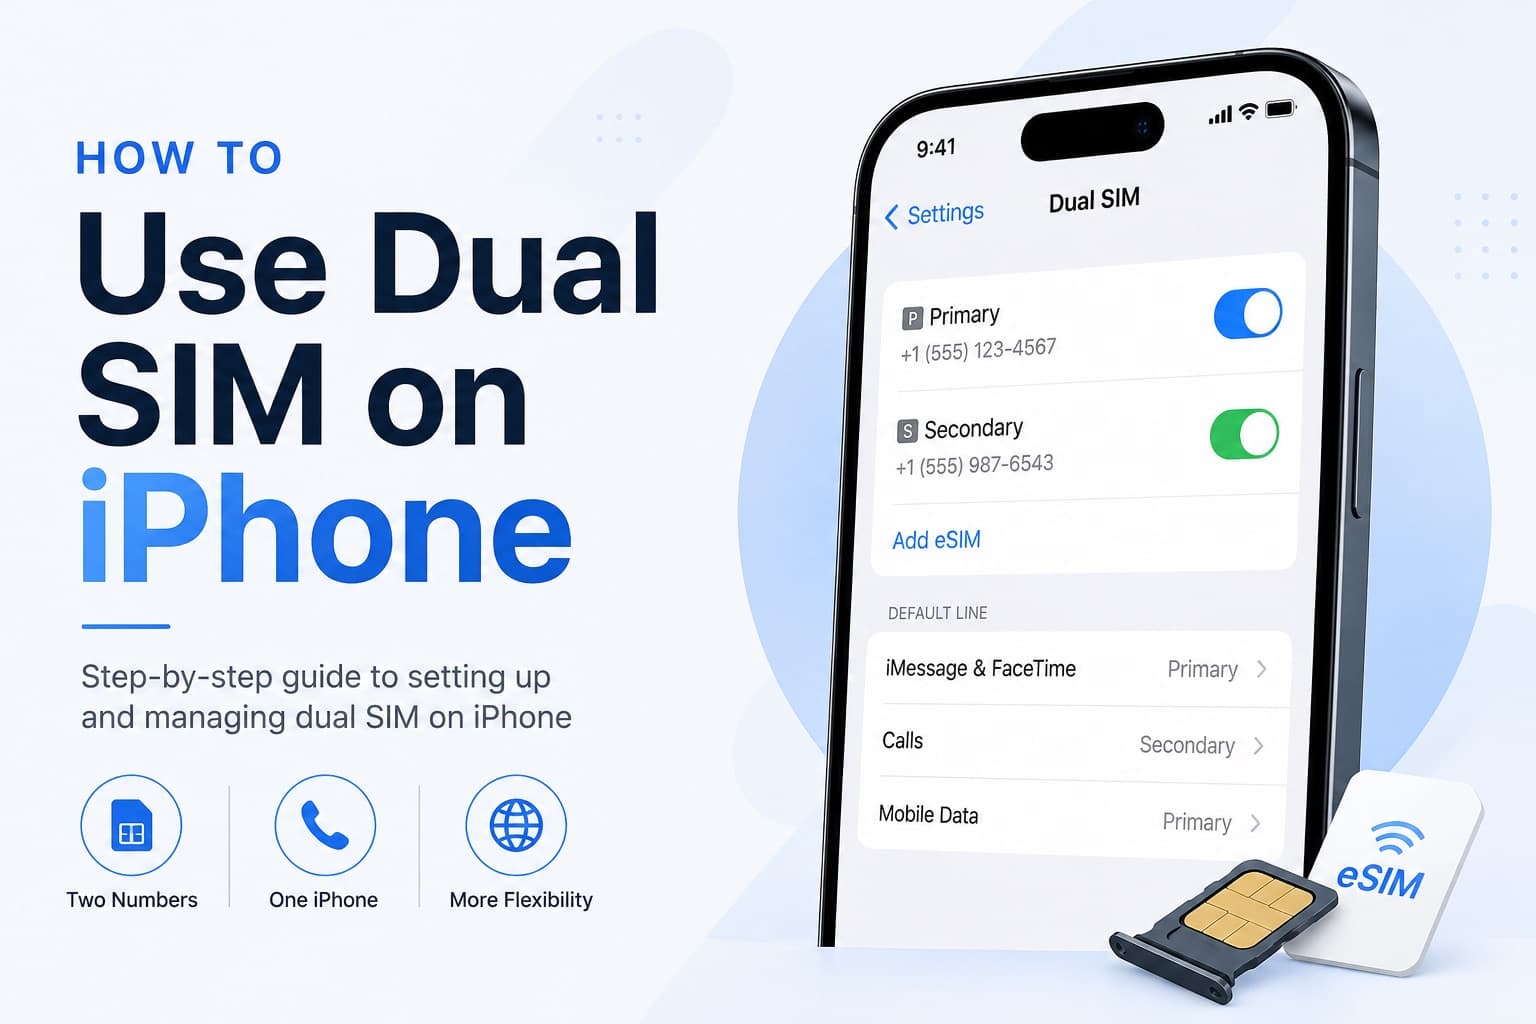
How to Receive SMS and Bank Texts Abroad Using a Travel eSIM
A properly configured dual-SIM iPhone lets you receive bank texts and 2FA codes on your home number while running affordable data through a travel eSIM. This guide walks you through every setting you need to configure before you fly.
July 8, 2026

Fixing eSIM Network Not Available: Multi-Network Switching vs QCI Priority
The eSIM network not available error usually comes down to one of three causes: no supported partner network in range, an activation issue, or a settings problem blocking cellular data. This guide explains how to diagnose each one and fix it fast.
June 22, 2026
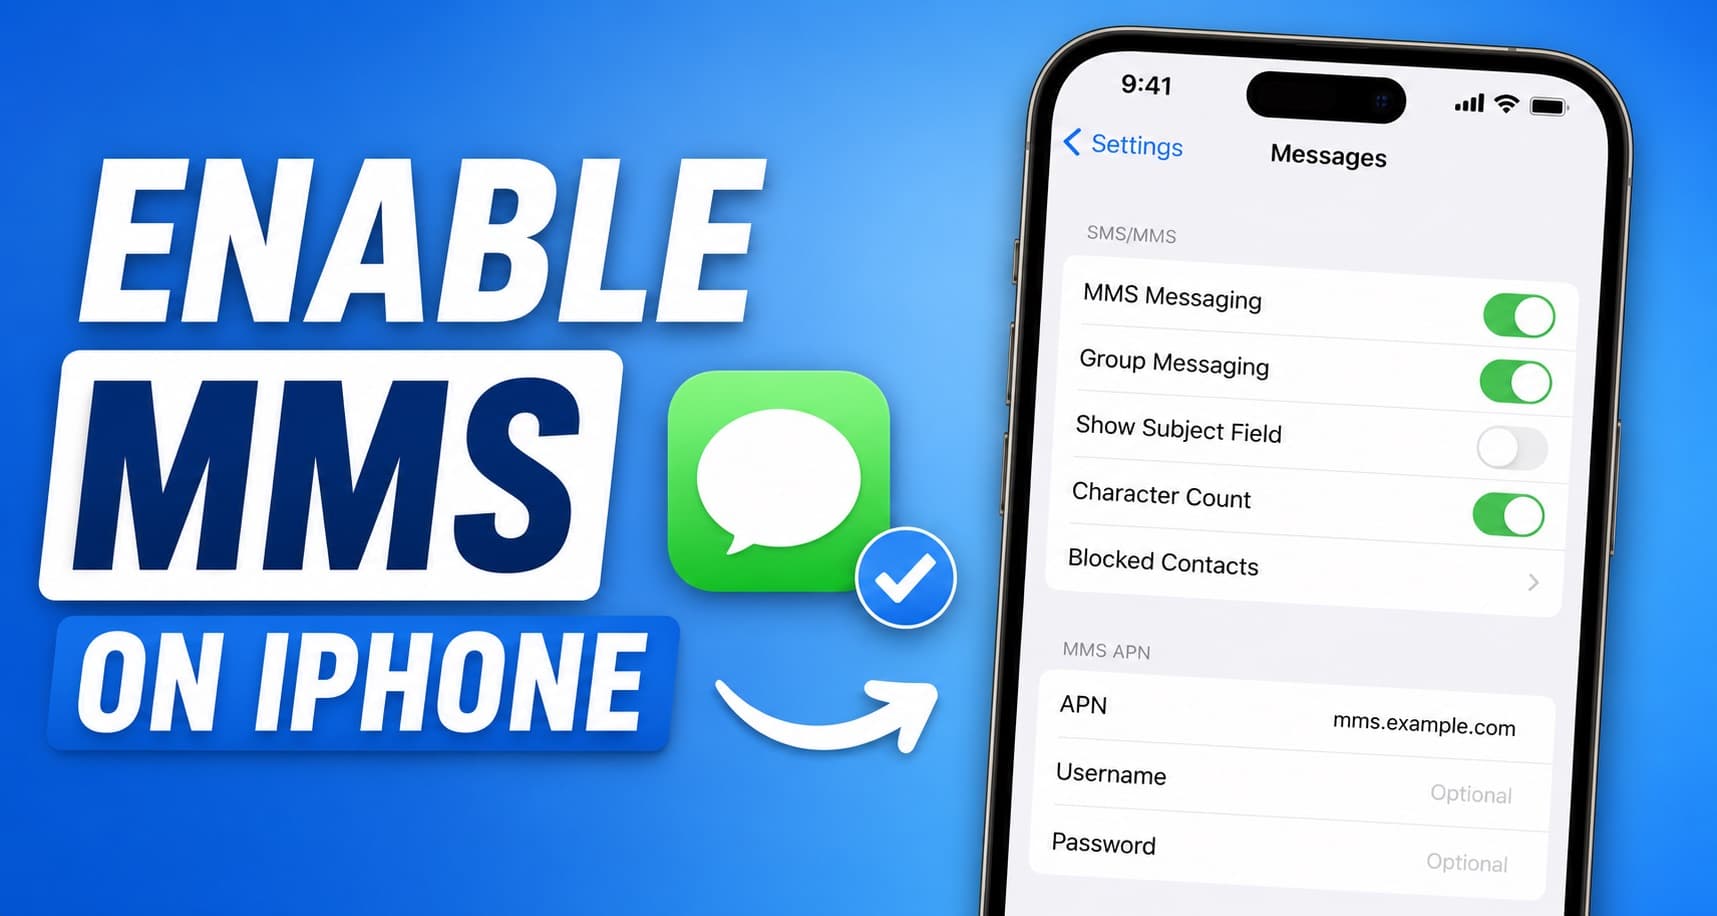
How to Enable MMS for iPhone and Fix Common Issues
A step-by-step guide to turning on MMS messaging on iPhone, fixing the most common reasons picture messages fail, and understanding how MMS works with eSIM and dual-SIM setups.
June 7, 2026